Setting up your account
Before you can start setting up and using the booking system, you need to register with AlgarveBookers.com. You can register by filling out the form at https://secure.algarvebookers.com/user/register.php. Once your application has been received, reviewed and approved, we get in contact with you and help you through the setup procedure. The details described in this chapter along with at least a valid Stripe ID must be provided by email in order to complete your registration (support@algarvebookers.com).
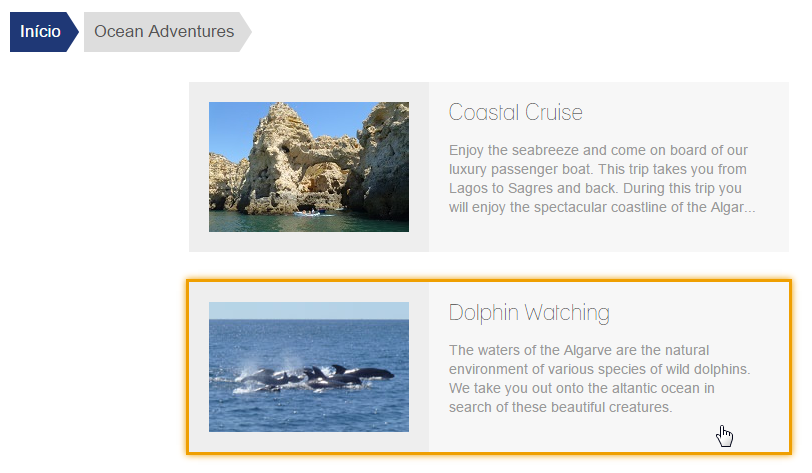
Custom logos
Throughout this manual you'll find screenshots of booking environments with a logo of an imaginary operator called "Ocean Adventures". Each operator can provide its own custom logo for the environments of its users. The logo must be provided in a .PNG format on a transparent background and having dimensions 300 x 73 pixels.

Due to the layout of the e-Tickets and PDF printouts made by the booking system, a logo with different dimensions is required there. This logo must be a .PNG file with transparency and dimensions 190 x 100 pixels.

Activity types
For each type of activity that your company operates, we need to receive the following details: a short description, additional information and an image that represents the activity type.
The short description and the image are both displayed within the booking environment of the booking agents and give your agent a quick summary of what that type of activity is about. A text length of about thirty words is recommended.
The additional information is meant for the customer and is added to the e-Ticket. Due to the restricted space on the e-Ticket, no more than twenty words are allowed here.

Note that the additional information is given to the agents as well at the final stage of the booking process, so the agent can communicate this information to the client.
Official ticket example
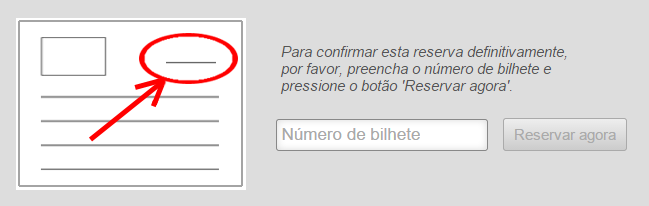
If your agents issue official tickets of your company, you can have them enter the corresponding ticket number into the booking system. This is an option that is described in more detail here.
To indicate what your official ticket looks like, and where to find the ticket number on the ticket, you can add an scan of a ticket as an example to the booking process of the agent. This scan is optional and is substituted by the default image shown below if none is provided.
Geographic locations
Your company must have at least one geographic check-in location setup in the booking system. When planning an activity, you can select a check-in location for your customers from the list of your locations. On the e-Ticket that your customer receives upon booking, a small map with the GPS coordinates of the location is shown as well as directions to the location and a QR-code for quick access to Google maps navigation.
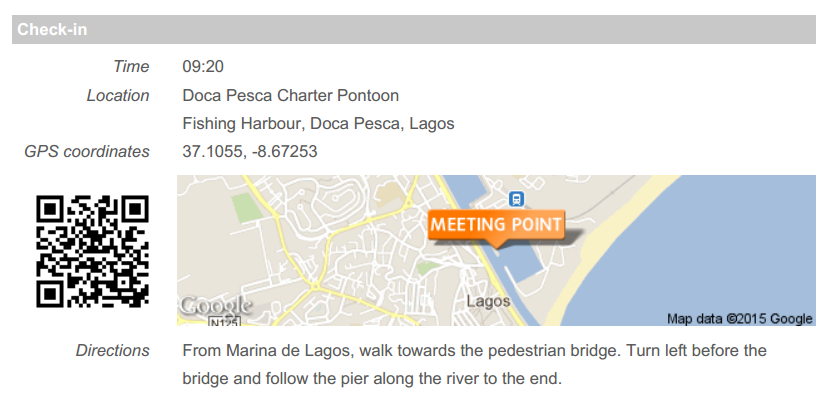
The following details must be provided for each geographic location you'd like to add as a selectable check-in location: the address or a description, the exact GPS position from Google maps and general directions to the location.
Once set up, all details of the check-in location are shown on the e-Ticket automatically.